


How to Install WordPress on Local Computer using WAMP
To start with a local WordPress installation, you need to download a software name WAMP. And also, download Latest release of WordPress.
Once you have downloaded WampServer, run the installation program and carefully follow on-screen instructions.At one point during the installation, WampServer will ask for the location of the default web browser.
By default it will use Internet Explorer, but you can change that to Google Chrome or Firefox by locating the browser in Program Files.Once you are done with the installation, launch WampServer.
Setting Up a Database for WordPress
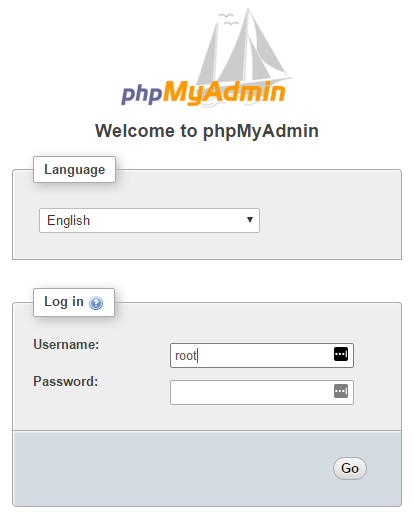
WampServer comes with phpMyAdmin, a web based application to manage MySQL databases. Click on the Wampserver icon in windows taskbar and then click on phpmyadmin.Or type localhost/phpmyadmin on your browser.The phpMyAdmin login screen will open in a new browser window. By default, the Username will be root, and you can leave the password field blank.
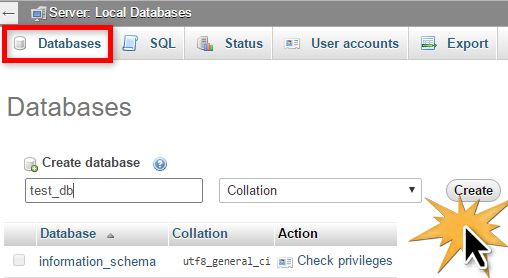
Once logged in, click on Databases in phpmMyAdmin to create a new database for WordPress. You will be asked to choose a name for your database. After that click on the Create button.
Installing WordPress on Windows with WAMP
The next step is to install WordPress. You will need to download a copy of WordPress from WordPress.org.Paste the wordpress folder into the C:\wamp64\www folder.You can rename the wordpress folder to anything you want, such as mysite etc. This will be the URL of your local WordPress site, so be sure to choose something you’ll remember easily.
Now open your web browser and go to http://localhost/mysite/
The WordPress database setup will start automatically. First it will ask you to select your language. After that it will show you some information about setting up your database. Click the Let’s Go button when you’re ready.
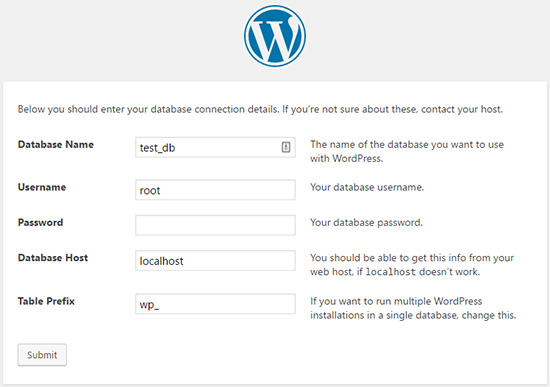
On the next screen, you’ll need to provide your database information. The database name will be the one that you entered in the last step.
Your default database username will be root and you can leave the password blank.
Next, click on the submit button and WordPress will create a configuration file for you.
After this you will see a screen informing you that WordPress has successfully connected to your database, and you can proceed with the installation.
Go ahead and click the Run the install button.
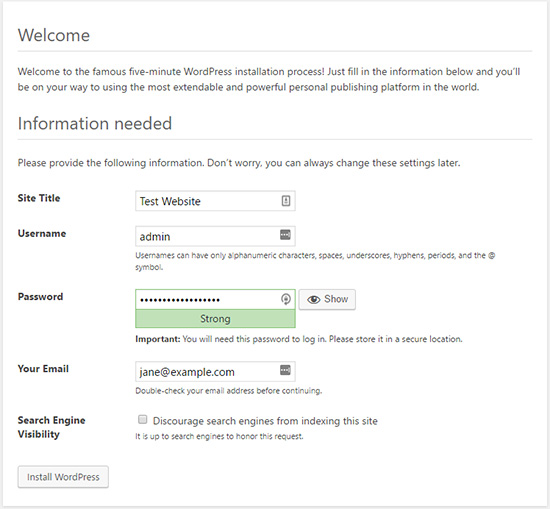
On the next screen, you can fill out the installation form. You need to provide a title for your website, choose an admin username / password, and provide admin email address.
Once you’re ready, press the Install WordPress button.
WordPress will quickly run the installation and create database tables. Once done, you will see a success message after the installation is complete.
You can then proceed to your WordPress dashboard by clicking on the Log inbutton.
Congratulations, you have successfully installed WordPress on a windows computer using WAMP.


